Tuesday, 28 February 2012

Creating a rollercoaster effect

To do this I did a similar method as the circle path but I used the line tool to draw a path through the shapes in the top perspective. I used the Z axis on the move tool to move the vertices of the path making it more interesting.

I then linked the camera using the path contraint.

On the motion tab at the bottom I checked the box "follow" and this allowed the camera to follow the path more realisticly. I rotated the camera to face the motion of the path to make it seem it was from a person riding a rolercoaters perspective.

I then checked the "bank" box. This made the camera lean into the corners which made the motion seem even more realistic, though sickly!

It was a very fun tutorial although I don't think I will use a rollercoaster effect for Da Vinci's work!

The camera view (bottom right) shows what the camera sees.

Using cameras

We learnt to use cameras so the viewer can gain a perspective on the animation.

I created a camera and on the right I selected the target option. This allows me to manually set where the camera is and where it focuses in on.

I made a couple of shapes and pointed the the camera into the middle of them. I then made a circle and enclosed all the shapes.
I then selected the camera and went to Animation > Constraints > Path Contraints and linked the camera to the circle creating the path. I could then raise the circle and rotate the camera to gain a better view. I also did the same but with the camera focus. This gave a nice roating effect.

The camera creates a very good tool for me to show my work and am looking forward to using it in my models.


Creating different bouncing balls

I was able to create 3 different balls but cloning them.

I then opened up the "dope sheet" which showed me what was happening in the animation and when. I then could move the "world" line to move the whole scenes animations to start at a different point.

To make the balls bounce at different times I could move the line of each individual ball or lengthen or shorten it. This gave a more interesting and life-like bouncing effect.

Creating the bouncing ball

The next step was to create a bouncing ball.

To do this I used the same techniques as I did when animating the ball but I used the curve editor to create a more realistic bounce as at first it looked just like a hovering ball.

I used the preset curve editor of "fast" to make the ball have a quick takeoff and fall.

I used the loop cycle tool to make my animation loop until the end of the frames. This is much easier than having to manually copy each keyframe.

Introduction Basics

We learnt how to animate objects and shapes in 3DS Max. At first I thought it may be challenging and slightly comlpex but it actually turned out much simpler.

We firstly were told how the Auto Key and the Set Key works. Each of them doing a similar job but the auto key being simpler and the set key being more accurate.

I used the auto key to move a box across the grid using the timeline. I selected the box, selected the auto key, moved the box, moved the timeline bar and it created the animation.

It was a very simple process.

Using the set key allowed me to move the start of the animation to another point. I did this by either moving it across or using the big key symbol. This saves the rotation, scale and position or the object.

Monday, 27 February 2012

Thoughts on models

Over the past 6 weeks I have been creating 3 models to do with Leonardo Da Vinci.

I have learnt lots of new skills in 3DS Max and I have really enjoyed creating the models.

The most complex model was the Siege machine. It used lots of techniques in one model. From the start it was a challenge for me as I could not create the correct shape in which the main bulk of the machine was. I tried many different shapes but found it was easier in the end to use a prism and bevel the top shape.

I found the tutorials useful as I used a selection of them. I found the boolean, loft and array tool most helpful as it provided the necessary effects which the model needed.

I enjoyed placing the materials on to the models as I think it made the work come together. UVW mapping was a hero in some areas as 3DS did not automatically place them in the correct position or size. The wood effect worked well.

I found the castle quite complex as I had different walls to place the stone material on and 3DS did not understand some of the shapes. UVW mapping helped a lot.

The cannon was fun for me to make as it was a simple concept with simple shapes but when it came together gave a life-like look.

I have really enjoyed creating the models and loved the skills I have learnt. I cannot wait to be able to use them again.

Tuesday, 21 February 2012

Rendering the castle

To give the castle a life-like look I used a stone texture which is commonly used in construction of castle walls. It uses solid stone image shown below.


This stone became much more realistic using the usual bump/gloss/specular tools and provided an effective castle wall.

In addition to the stone texture I used the move and extrude tools on certain edges and polygons to give a more bumpy look.

I have also modelled a ladder which lies behind the castle wall to give a sense of size in relation to a person.


I had a little bit of trouble rendering certain parts of the castle with the material as the wall contains bevelled parts which seems to distort the stone image. I tried used UVW mapping with the Gizmo tool and it helped.


Rendering the cannon

The cannon needed to have a realistic dark stone material, being held upon a wooden structure.

By studying the image I could see what it should be made of so I could search for a good textured material to render it with.

The image shows the cannon with age and with certain damaged wood. I did not want this as the model is supposed to be set to be used at any time. This means I had to use a healthy looking wood but which also had age to to it. These are the material I used for the cannon:


I used the bump/gloss/specular levels like the same as the siege machine. This gave the final look.


Adding materials to the siege machine

To create a life-like replica of the invention I had to add materials to render the model.

By studying Da Vinci's drawings, sketches and notes I was able to come up with ideas for the materials that would be used within the model.


The sketches suggest that the machine would use light wood, arranged in joining planks to form the main bulk.

For sturcture reasons I thought that the frame support and wheels should be made from stronger wood, which would be similar to teak or mahogany.

From here I searched for an appropriate representation of these materials. Below are the ones I chose:


Using the bump feature along with the gloss/specular levels I could make the material have a more realistic 3D look.


For the rope elements I used a coiled rope image. I used the bump/gloss/specular levels again and then applied them to the cylinders. 3DS Max automatically assigned the image to display the correct way on most of the shapes but I had to use UVW mapping to adjust the size and orientation of the material on certain sides.


This gave a look that I was pleased with and I think provides a nice extra texture to the model.


Monday, 20 February 2012

Creating the castle

I firstly tried constructing the wall from individual bricks using the Array tool but after 3DS Max crashing three times in a row I thought it best to use simpler shapes.

I created the wall by using basic boxes and then excuding the polygons in the editable poly menu.
Also from here I could highlight other "bricks" and put random notches and bumps to give the effect of a damaged wall.

I bevelled a window shape into the wall to create the window shape.


Here is the castle before material rendering.

Craeting the cannon

The cannon was a very interesting shape for me to create. It was not perfectly cylindrical and consisted of different textures and shapes.

I used a variety of Torus Knots (but circles) as lips around the cannon. The base was made from different boxes and cylinders which were aligned for accuracy.

The cannon holder used the soft selection tool and produced a cupped shape for the tube to sit in. I thought the shapes work well together and produce a life-like replica of the original image.

Here is the model before materials are used.


Other model examples

These pictures are a start for where I want to take my other components.

The cannon is based on this image. It is a traditional but powerful shape and would of been used at the time of Leonardo's invention.


The castle is going to be made to look battle-worn but not in ruins. This image is my inspiration to the castle model.


It will have stone material rendering and contain a small window

The other models

To go with the castle storming bridge I will create two other models. These will be in the same scene as the invention and will help set the atmosphere.

The two models are:
  • A castle wall and tower
  • A cannon
These will be placed into the scene to add to the dynamics of the invention. The castle will be used to give example of how big the invention is and how it was intented to be used. It will contain wall damage to portray its link with battles.

The cannon will be there because it represents the warfare in which the invention is aiding.

    Using daylight and mental ray

    In a video tutorial I learnt how to incorporate daylight into the model. This will be very useful in designing a certain model for a specific location as I could choose where it would be and how the sun would react.


    Using mental ray I could emphasise the light and allow it to make a more realistic, natural light.
    I really like the chrome effect of the sphere as it shows the rest of the models in its reflection and it looks very proffesional.

    Using light

    This tutorial taught me how to use the basic lighting effects in 3ds max.

    By selecting the create > lighting > Photometric lights I could create either a spotlight which could highlight a certain aspect of the model or a free light which could act as sunlight.

    By ticking the shadows box I could change the density and other characteristics of the shadows creted by the light source. This example shows a free light on a range of primitives.

    Creating the tension string

    To create the tension string I used the line tool and the loft tool.

    I drew the line and used the align tool to link the line between the 2 points which it needed to be. I then drew a really small circle and selected the loft tool (and then 'Get Shape'). By then selecting the line it gave it a thickness to make it more realistic.

    Using the array tool in the model

    To help create the steps of the model I used the array tool. This helped me to efficiently reproduce the step (created from a triangular prism) and place them in the accurate position.

    Using Boolean in model

    Using the Boolean tool I was able to create the hollow bridge component of the model.
    I used 2 triangular prisms, one larger than the other, and set the smaller one inside the larger one.

    Using the Boolean tool the smaller prism hollowed out the bridge.

    Monday, 13 February 2012

    Making the Da Vinci model

    Making the model is very interesting for me. It allows me to utilise the skills I have learnt in 3DS Max.

    Some parts of the creation was a little confusing for me as I had to think about what I have to start with to get the shape I need, e.g. a NGon shape to create the main base rather than a prism of some kind.

    I also had trouble with choosing the right kind of line to create the tension strings which conterweights the bridge.
    I managed to use the Boolean tool to create the hole through the bridge. I used the Loft tool to create a thicker tension string and the Array tool to recreate the steps.


    The screenshot shows the machine before I have introduced material

    Tuesday, 7 February 2012

    Leaf Tutorial

    This tutorial I found the most interesting to date. It allowed me to create a 3D leaf from a normal picture.

    I uses Photoshop as well as 3DS Max. By creating a mask layer and saving it as another file I could display the leaf on a normal plane. From here I used the soft selection tool to manipulate the vertices and make the leaf more lifelike.


    I really enjoyed making the leaf and it was very easy! I hope I am able to use this technique again.

    UVW Mapping on Plank

    We then learnt how to move the material on the shape to make it look better.

    I selected UVW map under the Modifier tab. And then the sub menu called 'Gizmo'. This allows me to use the align, move and rotate tool to manipulate the material.


    To select a polygon I converted it to a editable poly and then used the poly tag to change a certain side.

    Applying Material

    In this tutorial I learnt how to apply materials to make the model look more realistic.

    After experimenting with different objects I decided to go back and try to to render my Taj Mahal model.

    I used a photo of the doorway to make it look it and photos of textures of gold, brick and stone to make the rest of the buildings.

    To me it really makes it look much more realistic and this technique should always be used! (Although I cheated with the door)

    Castle Storming Machine

    The final design I looked at was the castle storming bridge.

    It consisted of different shapes and interesting methods of counter weight so it could move efficiently.

    I find it a very interesting design as it not used today and was designed for a specific purpose. I am thinking of this design as a possible final model design.

    Aerial Screw Helicopter Moodboard

    The next invention I looked at in greater detail was the helicopter.

    Da Vinci created it using precise measurements and angles so it could lift. I gives a very interesting shape on the upper loft element.

    Ornithopter Mood Board

    I firstly looked at Da Vinci's Ornithopter.

    I tried to break it apart to view the different elements which make it up and how could create them on 3DS Max and what tools would be needed.

    Monday, 6 February 2012

    Using the Array tool

    This tutorial introduced me to the array tool. It allows me to copy a shape and place them a specified width away from them or overlapping them.

    This would be a very useful method for accurately cloning a shape and placing them exactly where I need them.

    Coat Hanger tutorial

    This tutorial showed me how to use the loft tool to create a coat hanger.

    In the Front viewport I drew an outline of a coat hanger using the spline line tool.

    I then drew a small circle. Then I selected the Loft tool highlighting the small circle and 'Get Shape'. This added to the coat hanger and gave it its wire shape.

    I like this technique as it seems quite simple and is easy to do. The model seems to come alive!!

    Boolean Tool

    I first of all created a large flat box. I then slected the Spline text tool and wrote a letter of my choice (J).

    I then extruded it and changed it an editable poly. I then the Boolean tool and told it to slect Operand B (the letter). Then I selected 'Subtract B from A' thus creating the model show!

    Spring tutorial

    This tutorial showed me how to create a spring.

    I used the Helix tool to draw the size, height and curvature and then I could change the number of turns and the bias to give a spring coil effect.

    Then I drew another circle. From the geometry menu I chose 'Get Shape' with 'move' selected. I selected the helix and the sceond circle becomes the width of the helix.

    Lathe Tool

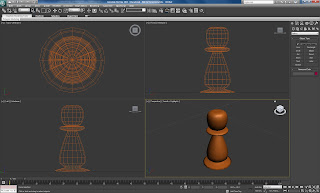
    In this tutorial I used Illustrator and the lathe tool to create a chess piece.

    I drew half a cross-section of the chess piece in illustrator and saved it as a 'Illustrator 3' file as it is the simpliest form and easy for 3ds max to understand.

    From here I used the move tool to move the pivot to the center where I wanted the shape to mould round. And by selecting the lathe tool it created the shape for me.

    Creating Mood Boards

    The next step towards making the final model and animtion is to make a short-list of inventions which will be the final one.

    By looking at the different inventions on the research board I can evaluate how well they will be able to be modelling and animated.

    By short-list consists of the "Aerial Screw Helicopter", the "Castle storming device" and Da Vinci's "Ornithopter". Each of these inventions have different elements which could produce different outcomes.

    From here I will produce mood boards on each of the 3 inventions and state which modelling techniques I would personally use and sketch different ideas on how I would make it.

    Thursday, 2 February 2012

    Research Board

    After researching different aspects of Da Vinci's inventions I am able to compare them and see what each device has to offer. From here I can can select the few I am really interested in and see how I could model and animate them.


    Here is my research board.